CASE STUDIES
Published on Mar. 28th 2024
Precision Manufacturing: Using 3D Optical Metrology for More Efficient Inspection
This case study looks at how Shenzhou Company adopted 3D scanning for precision manufacturing. Through the implementation of 3D optical metrology solutions for inspection, Shenzhou Company reduced labor time and material costs by 30% and 50% respectively.
About the Client
- Company Shenzhou Precision Manufacturing
- Service Precision manufacturing
- Need Modern, digital inspection methods
- Solution SHINING 3D FreeScan UE Pro
This case study is also available on YouTube:
Introduction
With the development of precision engineering, manufacturers are facing stricter demands for precision and repeatability than ever before. However, meeting these demands is challenging with traditional manufacturing and the current inspection methods.
To remain competitive, long-standing manufacturers like precision manufacturer Shenzhou Company must embrace modern high-precision tools. They not only need high-precision machines, but also high-precision inspection solutions to guarantee dimensional accuracy down to the micron.
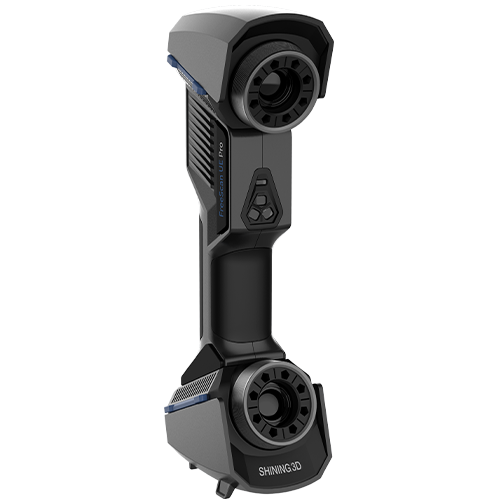
Shenzhou Company decided to upgrade their measurement capabilities by adopting SHINING 3D’s FreeScan UE Pro. This multifunctional, handheld laser 3D scanner enables them to quickly and accurately gather data of the tanker heads they produce for their clients.

Discover the product you're looking for
- Full specifications
- Using scenarios
- Key features
- Even comes with a bundle!
Traditional Inspection Method and Challenges
Before implementing 3D scanning for precision manufacturing inspections, the team of Shenzhou Company used wooden referenceto manually check specific areas of each small to medium-sized workpiece.
This method relies on the staff’s experience and skills, and can be cumbersome, time-consuming, and prone to human error. Plus, the wooden reference can wear out over time, causing extra error.
 A staff member of Shenzhou Company inspecting a workpiece in the traditional, manual manner.
For larger workpieces, i.e., workpieces that are 5 to 6 meters in diameter, the challenges are exponentially difficult to overcome.
3D Scanning for Precision Manufacturing
Now, with the FreeScan UE Pro 3D scanner, staff can collect complete workpiece data in minutes. In addition to blue laser technology, capture data in ease even with black and reflective surface, this optical 3D measurement tool integrates the built-in photogrammetry technology.
 Using 3D scanning for precision manufacturing part inspection.
The FreeScan UE Pro serves to capture mesh data to later ensure high precision in data stitching and an accuracy up to 0.02mm.
For large parts, Shenzhou Company use built-in photogrammetry that supports by FreeScan UE Pro. These photogrammetry bars enable the scanner to and reduce error over larger distances, guaranteeing a volumetric accuracy of 0.02mm + 0.015mm/m.
 Shenzhou Company uses the FreeScan UE Pro’s photogrammetry scale bar for large-scale inspections.
*Note: The FreeScan Series is ISO 17025 certified, following VDI/VDE 2634 Part 3 standards. This involves evaluating detection error performance based on traceable sphere diameter measurement data. Measurements are conducted from multiple perspectives within the working range using traceable length standards to assess sphere-to-sphere spacing errors. Volumetric accuracy can also be further optimized through build-in photogrammetry.
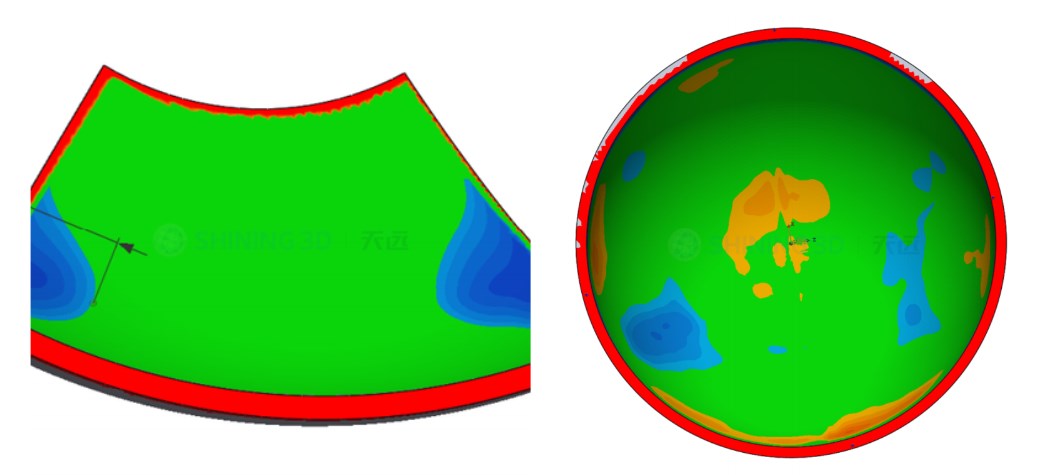
After 3D scanning the workpieces, the quality control team can export the data to their 3D inspection software to comprehensively analyze them.

3D inspection result of different workpieces.
The team of Shenzhou Company noticed a sharp increase in efficiency after integrating the FreeScan UE Pro to their workflow:
“Our transition from traditional inspection to digital 3D inspection methods has been remarkable. Labor and material costs are down by 30% and 50% respectively, while our inspection efficiency has soared by 80%. This innovative approach has paved the way for a fully digitized process, guiding our evolution toward advanced manufacturing practices.”
— M. Zhu, Quality Management Director at Shenzhou Company
Conclusion
3D scanning for precision manufacturing is becoming essential to stay competitive in the manufacturing land scape. Shenzhou Company joined hands with SHINING 3D to initiate its digital transformation, and states that it will pursue investment in 3D inspection workflows to stay on top of the growing precision engineering requirements.
Are you ready to upgrade your quality inspection workflow? Contact our team today to see how our range of 3D Metrology Solutions can meet your requirements.

FreeScan UE Pro
FreeScan UE Pro equips high-precision, metrology-grade accuracy and lightweight design while improving the ability to fine-scan and global precision control large-scale workpiece scanning.
- Metrology-Grade High Accuracy
- Global Precision Control
- Multiple Scanning Modes

